

A content creator checklist is a repeatable set of steps that takes a piece of content from idea to published post to measured result, so nothing gets skipped and nothing gets left to memory. The top-level sequence looks like this: plan, research, create, edit, publish, promote, measure. Each stage feeds the next, and skipping one is usually why a video flops or a blog post never gets found.
Follow the sequence and you get three things most creators struggle to build alone: consistency across posts, discoverability on search and social, and a trackable read on what's actually working.
- Plan: define the goal, audience, and format before you write or film anything
- Research: validate the topic with keyword, hashtag, or trend checks
- Create: draft, shoot, or design the piece using a brief and outline
- Edit: run quality, SEO, and accessibility checks before anything goes live
- Publish: schedule with the right specs, metadata, and links for each platform
- Promote: push it through owned channels, community, and paid options
- Measure: track KPIs and feed what you learn back into the next piece
Key Takeaways
A content creator checklist works because it turns a mental to-do list into a repeatable sequence covering planning, production, publishing, promotion, and measurement.
| Point | Details |
|---|---|
| Follow the seven-stage sequence | Plan, research, create, edit, publish, promote, and measure, in that order, every time. |
| Narrow your content pillars | Commit to three core pillars instead of chasing every trend or format. |
| Build a lean tool stack first | Map tools to the eight creator jobs and upgrade only when a job starts costing real hours. |
| Batch by task, not by piece | Group filming, editing, and scheduling into separate blocks to cut context-switching. |
| Treat link-in-bio as a checklist item | Update campaign links and check analytics with a tool like Lflow every time you publish, not after something breaks. |
Table of Contents
- Why a Content Creator Checklist Saves You From Yourself
- The Complete Content Creator Checklist, Start to Finish
- Tools and Templates: Building Your Starter Stack
- Where the Link-in-Bio Update Fits in Your Checklist
- Time Management: Protecting Your Actual Creative Hours
- What Most Creators Get Wrong About Consistency
- Let Lflow Handle Your Link-in-Bio Checklist Item
- Sources
Why a Content Creator Checklist Saves You From Yourself
Most creators don't lose momentum because they lack ideas. They lose it because they forget a step, publish something half finished, or realize two weeks later that the thumbnail never got updated. A checklist removes that risk by turning a mental to-do list into a fixed sequence you run every time.
The payoff shows up in three places. Quality control catches errors before an audience does, not after. Repeatability means your fifth video takes less mental energy than your first, because the decisions are already made. And if you work with a team, editor, or virtual assistant, a shared checklist keeps everyone aligned on what "done" actually means.
- Quality control: catch broken links, typos, and missing alt text before publishing
- Repeatability: turn a one-off process into a system you can run weekly
- Team alignment: give collaborators a shared definition of "ready to publish"
Checklists matter most in three scenarios: a single high-stakes piece (a launch video, a pitch deck), a recurring series (a weekly newsletter, a podcast), or a repurposing campaign where one piece of content gets reshaped into five others. A comprehensive checklist approach, the kind ClickUp recommends, spans everything from keyword research and audience personas to distribution and performance tracking. That full-lifecycle view is exactly what separates a creator who posts randomly from one who builds a system.
The Complete Content Creator Checklist, Start to Finish
This is the operational version. Copy it into a project management tool, a shared doc, or a printed sheet taped above your desk. Each phase below builds on the one before it, and skipping a phase is usually where things start going sideways.
1. Planning: set the target before you touch the content
Before you write a single word, answer four questions. What's the goal of this piece (traffic, leads, brand awareness, sales)? Who is it for, specifically, not "everyone interested in fitness" but "beginner runners training for their first 5K"? What does success look like in numbers? And which platform does this belong on first?
- Write a one-sentence goal for the piece (traffic, engagement, conversion, retention)
- Define the specific audience segment, not a broad demographic
- Set one primary KPI and one secondary KPI before you start
- Confirm which of your three to five content pillars this piece supports
- Map where this piece will live first and where it gets repurposed later
Content pillars matter more than most new creators realize. Forbes' reporting on what actually works for creators in 2026 points to a narrower focus, often a narrow set of core pillars, as the faster path to building real authority instead of chasing every trend. Going narrower than feels comfortable tends to pay off faster than trying to cover everything.
2. Research and ideation: validate before you produce
An idea that sounds good in your head can still be a dead end. This phase exists to catch that before you spend hours producing something nobody's searching for.
- Run a keyword or hashtag search to confirm demand exists for the topic
- Check what questions your audience is actually asking (comments, DMs, forums)
- Scan three competitor pieces on the same topic and note format gaps
- Decide the format based on what's underserved, not what's trendy
- Confirm the topic fits a content pillar you've already committed to
3. Production: brief, draft, and build the piece
Production is where most time gets spent and most shortcuts get taken. A short brief up front saves far more time than it costs.
- Write a one-paragraph content brief: goal, audience, key message, call to action
- Draft the hook or opening line first; it decides whether anyone keeps watching or reading
- Build an outline or shot list before drafting the full piece
- Set draft rules in advance (length limits, tone, banned words, formatting standards)
- Add captions for any video content, since a large share of viewers watch on mute
- Note accessibility needs early: alt text placeholders, caption timing, color contrast
Pro Tip: Write your hook and your call to action before you write anything else. If you can't summarize why someone should care in one sentence, the piece isn't ready to produce yet.
4. Editing and quality assurance: the pass most creators skip
This is the phase that separates content that performs from content that looks fine but underperforms. Content Marketing Institute frames strong content around five benchmarks: it should be Findable, Readable, Understandable, Actionable, and Shareable. Run your draft against all five before you call it finished.
- Read the piece aloud once to catch awkward phrasing and pacing issues
- Check headings and structure for a logical flow from start to finish
- Verify meta title, meta description, and headers if it's a written piece
- Confirm alt text exists for every image and caption exists for every video
- Fact-check every statistic, quote, or claim against its original source
- Check every link, especially calls to action, to confirm it goes where intended
- Get a second set of eyes if you're working with even one collaborator
5. Visuals: specs that keep you from reposting later
Wrong specs are a quiet killer. A thumbnail cropped for the wrong aspect ratio, a video exported at the wrong resolution, or a caption file that doesn't sync will quietly tank performance even when the content itself is good. Final visual and accessibility checks, including alt text, captions, and aspect ratios, belong at the very end of production, not as an afterthought once something's already scheduled, according to Brafton's content creation guide.
- Confirm aspect ratio matches the platform (9:16 for Reels and TikTok, 16:9 for YouTube, 1:1 or 4:5 for feed posts)
- Export thumbnails at the platform's recommended resolution, not a guess
- Add burned-in or platform-native captions to every video
- Write descriptive alt text for every image, not a keyword dump
- Name files consistently (date, platform, topic) so nothing gets lost in a folder
6. Publishing: get the mechanics right
Publishing mistakes are almost always avoidable and almost always embarrassing. Wrong time zone, missing metadata, dead link in the description.
- Schedule the post for your audience's active hours, adjusted for their time zone, not yours
- Fill in every metadata field the platform allows (title, tags, category, location)
- Update your link-in-bio or landing page link before, not after, the post goes live
- Double-check the call-to-action link works on both mobile and desktop
- Confirm cross-posting settings won't duplicate or conflict with native scheduling tools
7. Promotion: don't just post and disappear
Publishing isn't the finish line. It's the starting gun for the promotion phase, and this is where most solo creators quietly give up too early.
- Share to every owned channel: email list, Stories, community groups, other social profiles
- Prompt engagement directly by asking a specific question in the caption or comments
- Test a small paid boost if the organic response in the first hour looks strong
- Reach out to one relevant partner, collaborator, or small influencer for a share or shoutout
- Plan the repurposing path now: which platform gets the clip, the quote card, the thread
8. Measurement and iteration: close the loop
A checklist without a review step is just a production line. The review step is what turns your content into a system that improves.
- Check your primary KPI at the 30-day mark and again at 90 days
- Compare performance against your last three similar pieces, not against a vague benchmark
- Track platform-specific signals: audience retention for video, scroll depth for articles
- Test one variable at a time (thumbnail, hook, posting time) rather than overhauling everything at once, an approach Timeskip's 2026 content guide recommends over full reinvention
- Archive top performers into a swipe file for future repurposing
- Retire or refresh anything underperforming after two review cycles
Tools and Templates: Building Your Starter Stack
Creators repeat eight jobs no matter what platform they work on: recording, editing, scheduling, audience growth, community management, monetization, analytics, and finance. The smartest way to build a tool stack is to map tools to jobs, not to buy whatever's trending, an approach Kompozy's 2026 creator tool stack breakdown lays out clearly. Buy for a job you actually have, not a job you might have someday.
A lean starter stack covers the essentials without bleeding your budget:
- Recording: your phone camera plus a $20 to $30 clip-on microphone covers most short-form needs
- Editing: one mobile or desktop editor (free tier is fine at first)
- Scheduling: a single scheduler that covers your top two platforms
- Analytics: native platform insights before you pay for a third-party dashboard
- Link management: one link-in-bio tool to consolidate destinations and track clicks
Upgrade to pro tools once a job starts eating hours you don't have, not before. If editing takes four hours per video, that's the signal to invest in a faster editor or an editor-for-hire. If you're managing ten links across five campaigns by hand, that's the signal to move to a dedicated link management platform. Mapping the decision to the job, rather than the category, keeps you from tool bloat and wasted subscriptions.
Three templates are worth building once and reusing forever: a content brief template (goal, audience, message, CTA), an editorial calendar (platform, format, publish date, status), and a self-review checklist (the editing pass from the section above, saved as a reusable document). Reusable templates like these are what let creators scale production without rebuilding the wheel every week, a point ClickUp's checklist guide makes directly, and a solid content planning workflow can help formalize how your team runs the whole cycle.
| Job | Lean tool | Upgrade trigger |
|---|---|---|
| Recording | Phone camera + clip mic | Audio or video quality complaints from viewers |
| Editing | Free mobile/desktop editor | Editing eats more than 3 to 4 hours per piece |
| Scheduling | Single-platform scheduler | Managing 3+ platforms manually |
| Link management | Free link-in-bio tool | Running multiple simultaneous campaigns |
Where the Link-in-Bio Update Fits in Your Checklist
Your link-in-bio page is part of the publishing checklist, not an afterthought you fix once someone complains a link is dead. It deserves its own review pass every time you launch a new campaign or piece of content.
- Add or update the campaign-specific link before the post goes live, not after
- Tag links with UTM parameters so campaign traffic shows up separately in analytics
- Confirm your custom domain (if you use one) is pointing correctly and matches your brand
- Check click and scan analytics weekly to see which links are actually earning attention
- Generate a QR code for any offline promotion (business cards, event signage, packaging)
This step belongs right after "publishing" and before "promotion" in your master checklist. A profile linking guide for creators walks through the mechanics in more depth if you want a full setup reference, and a proper bio page setup guide covers the initial build from scratch.
Time Management: Protecting Your Actual Creative Hours
The biggest time drain for most creators isn't creating content. It's context-switching between fifteen small tasks that each take ten minutes but destroy your focus for an hour. Batching fixes this more reliably than any productivity app.
Set aside one block for filming or drafting, a separate block for editing, and a separate block for scheduling and promotion. Doing all three in the same sitting for a single piece feels efficient but actually costs more time than batching five pieces of the same task together. If you're shooting video, film four weeks of content pillars in one afternoon instead of once a week; the setup time alone justifies it.
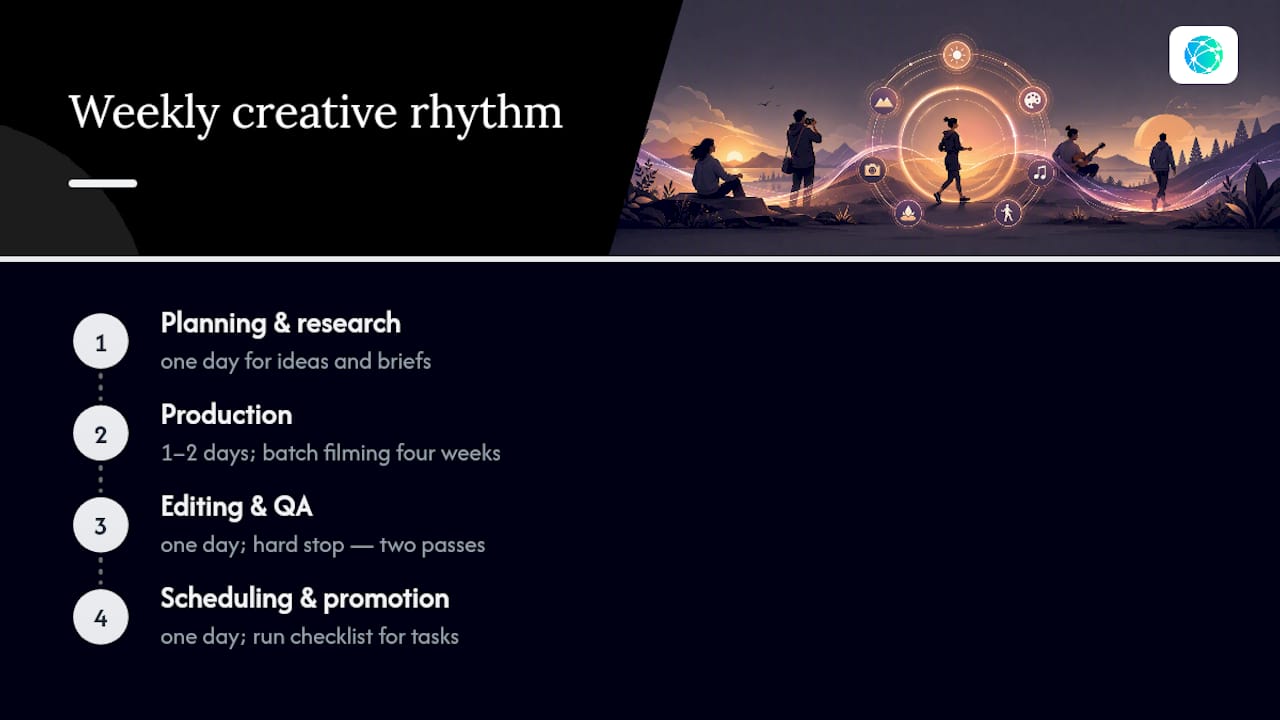
Build a fixed weekly rhythm: one day for planning and research, one or two for production, one for editing and QA, and one for scheduling and promotion follow-up. Treat your checklist as the thing that runs during each block, not a document you consult occasionally. The checklist is what lets you stop relying on memory and start relying on a system, which is the entire point of having one.
Guard against the trap of "just one more revision." Set a hard stop for editing (two passes, not five) and move on. Perfectionism on a single post costs you the three posts you didn't have time to make instead.
What Most Creators Get Wrong About Consistency
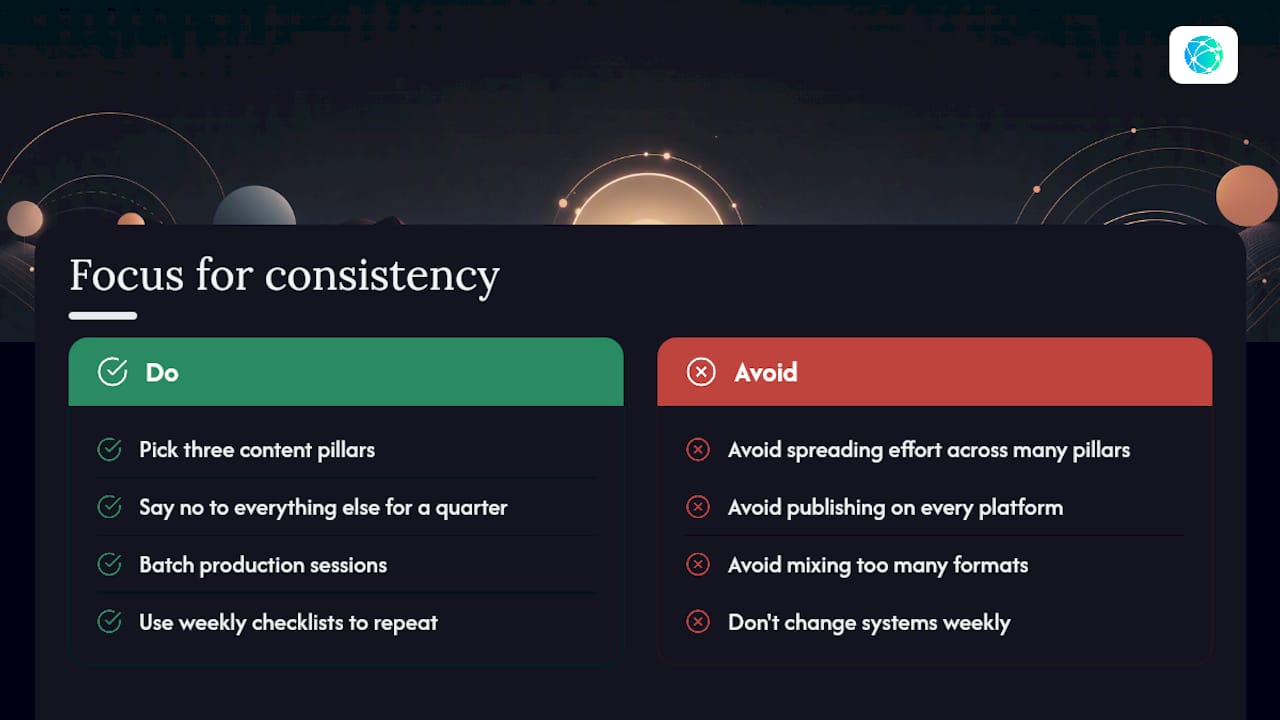
The mistake I see most often isn't a lack of effort. It's spreading that effort across too many pillars, too many platforms, and too many formats at once. Pick three content pillars and say no to everything else for at least a quarter. That narrowing feels uncomfortable at first and pays off within weeks.
Batching and checklists aren't just organizational habits. They're productivity multipliers, because they remove the decision fatigue that kills momentum by week three. The creators who last aren't the ones with the best ideas. They're the ones who built a system boring enough to repeat every single week.
— Axion
Let Lflow Handle Your Link-in-Bio Checklist Item
Managing campaign links by hand, updating them across five profiles, and trying to track which link drove which click is the kind of checklist item that quietly eats an hour every week. Lflow consolidates every destination, your store, your latest video, your socials, into one branded link with unlimited destinations, built-in click and scan analytics, and a free QR code generator for offline promotion.
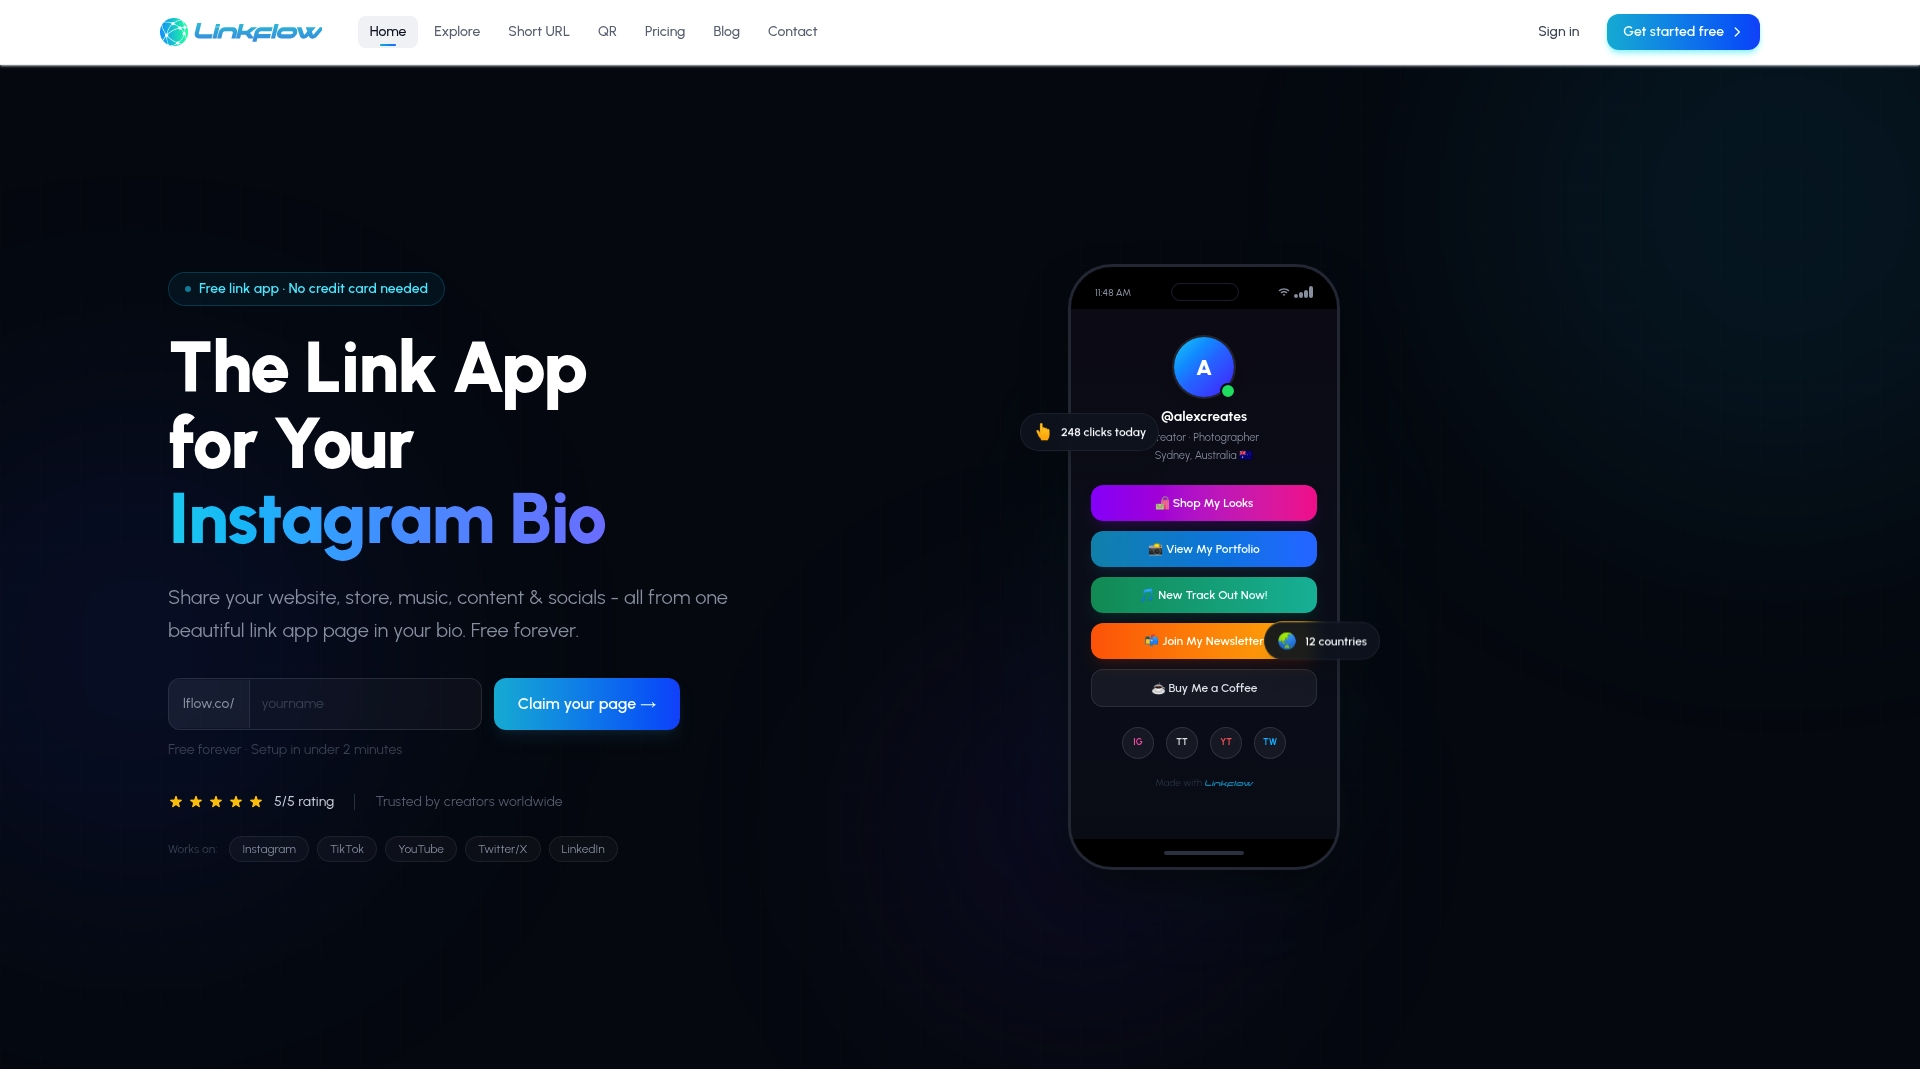
Slot Lflow into your publishing checklist right where the link-in-bio step belongs: update your campaign link before the post goes live, check the analytics dashboard during your weekly review, and swap in a fresh QR code whenever you're promoting something offline. Setup takes under two minutes, and the free plan covers the core features most creators need without a paid subscription. If you want the offline promotion piece covered too, the QR code generator is free to use on any link. Start by claiming your branded page and adding your first campaign link today.
Sources
- How to Create a Content Creation Checklist
- Must-Have Checklist To Creating Valuable Content
- The creator tool stack 2026: best-in-class for every job a creator does · Kompozy
- Want to become a content creator in 2026? Here’s what really matters
- The Ultimate Content Creation Checklist to Streamline Your Strategy