

Scheduled links for launches are links you set to go live, expire, or auto-archive at a chosen date and time so a campaign, product, or content drop rolls out on cue. The single most important action is this: write, stage, and schedule every post and destination link with UTM parameters before launch week starts, ideally 7 to 14 days out, then lock exact times 48 to 72 hours before go-live. Lflow is the practical platform for setting this up.
TL;DR:
- Scheduling links at the exact second requires configuring a single authoritative UTC time and pairing it with precise local times for all platforms.
- Using UTM parameters consistently across channels is essential for accurate attribution, especially when tracking conversions and offline scans.
- Launch phases should be carefully timed, with drafts prepared two weeks in advance and final locking 48 to 72 hours before go-live to ensure smooth execution.
- A dedicated link hub with auto-archiving and real-time analytics simplifies campaign management and reduces manual effort during launch.
- Coordinating email, social, and paid ads with unified tagging and timing enhances overall campaign effectiveness and measurement.
Table of Contents
- How Do You Plan a Launch Timeline for Scheduled Links?
- How Do You Set Up Scheduled Links With Exact-Time Precision?
- What UTM Parameters and Analytics Should You Track?
- What Content and Timing Works Best for Launch Posts?
- Pre-Launch and Launch-Day Checklist
- Why a Scheduling-Enabled Link Hub Simplifies Launches
- Should Scheduled Links Connect to Email and Other Channels?
- Perspective: Common Launch Mistakes and Quick Fixes
- Get Started With Lflow for Your Next Launch
- Sources
How Do You Plan a Launch Timeline for Scheduled Links?
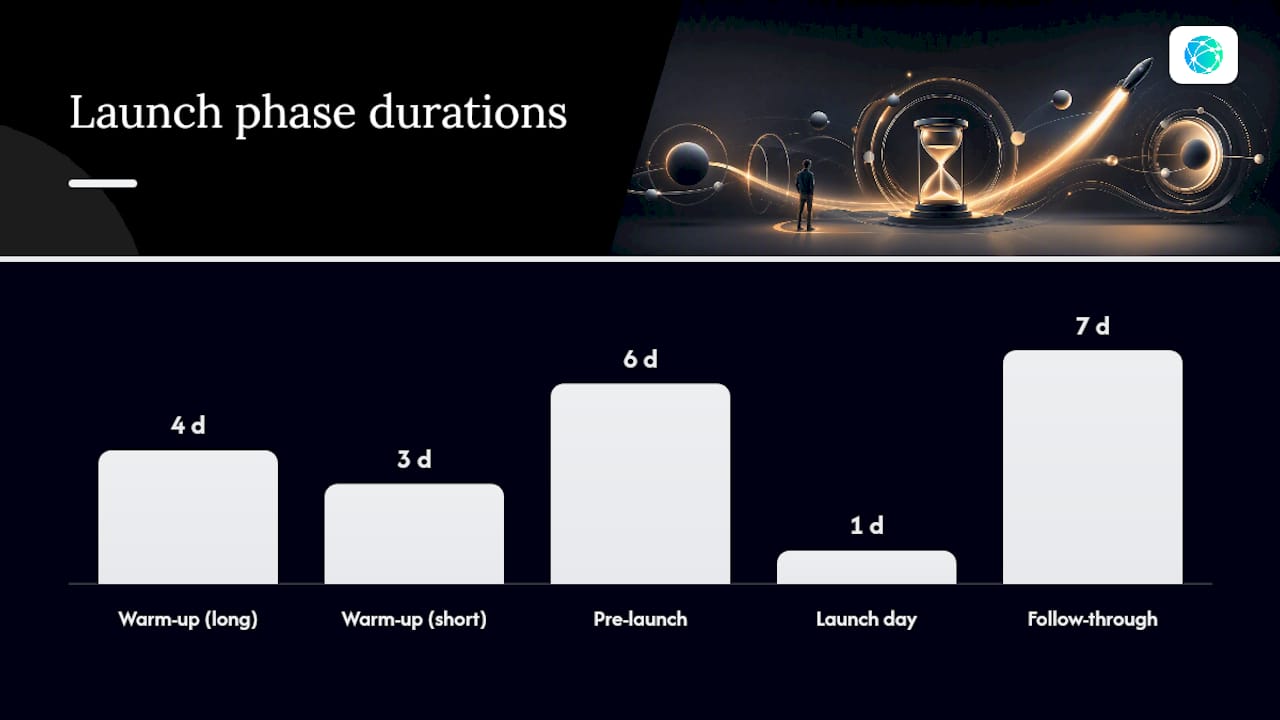
A launch runs cleanest when you break it into four phases instead of treating "launch day" as one big scramble. This structure mirrors how experienced launch teams map a posting week, and it works whether you're a solo creator or a five-person marketing team.
- Warm-up (days -14 to -10, or -7 to -5 for shorter runs): Tease the launch without revealing the offer. Build anticipation on your primary platform.
- Pre-launch build (days -7 to -2): Share behind-the-scenes content, countdowns, and early access hooks. This is when your scheduled links should already exist in draft form, even if they're not live yet.
- Launch day (day 0): Your links go live at the exact scheduled time, paired with coordinated posts across every platform you use.
- Follow-through (days +1 to +7): Recap posts, testimonials, and reminder content keep traffic flowing to a link that's easy to forget once the initial excitement fades.
The most efficient routine: draft every piece of content on the Sunday before launch week in one sitting, roughly four to six hours of focused work. Stage it 7 to 14 days ahead, then lock exact publish times 48 to 72 hours before launch once assets and approvals are final.
For a solo creator, this means one long writing session followed by short daily check-ins during launch week. A small team can split roles: one person owns content, another owns scheduling and QA, and a third handles live monitoring on launch day.
How Do You Set Up Scheduled Links With Exact-Time Precision?
Minute-level accuracy matters more than people assume. If your Instagram post goes live at 10:00 AM but your link doesn't activate until 10:07 AM, early clickers hit a dead page, and some never come back. Coordinated launches need exact time scheduling, timezone support, and multi-platform synchronization working together, not as separate afterthoughts.
Set a single authoritative launch time in UTC, then calculate every platform's local posting time from that anchor. This avoids the drift that happens when three team members schedule from three different time zones and each rounds "close enough" differently.
Inside Lflow, you can configure a link's go-live moment down to the second, and pair it with an auto-archive rule so the link disappears once it's no longer useful. A typical setup:
- Go-live: 10:00:00 AM on launch day.
- Auto-archive: seven days later, so the link doesn't linger and confuse people browsing your hub weeks later.
- Redirect fallback: point early or late clickers to a holding page instead of a broken link.
For anything beyond a handful of links, bulk staging through a CSV upload or campaign builder saves hours. Most schedulers designed for launches expect you to load multiple posts at once and assign them across platforms in a single pass.
Pro Tip: Preview every scheduled link in a private browser tab 24 hours before launch. This catches broken redirects, expired promo codes, or permission errors before your audience does.
What UTM Parameters and Analytics Should You Track?
Every scheduled link needs a UTM tag, or you'll have no idea which platform actually drove your signups. The standard structure covers four fields: utm_source, utm_medium, utm_campaign, and utm_content. A real example from a spring product drop might look like utm_source=instagram, utm_medium=social, utm_campaign=spring_launch, utm_content=bio_link_button.
Apply this same naming pattern across every platform so your analytics dashboard can compare performance cleanly instead of mixing formats.
Most modern schedulers auto-generate UTMs or let you append them at the point of scheduling, which removes the manual tagging step that trips up smaller teams during a busy launch week.
Once links go live, check these numbers at two intervals:
- First hour: Click volume by platform, and whether any link is returning errors.
- 24 hours: Conversion rate per source, so you know which platform actually converts versus just generates clicks.
- QR code scans: If you're running offline promotion, scan analytics tell you whether print or in-person touchpoints are pulling their weight.
A quick verification habit: open the scheduled link preview, test it from a private browser tab, then confirm the first clicks are registering in your dashboard. That three-step check catches most failures within minutes, not hours.
What Content and Timing Works Best for Launch Posts?
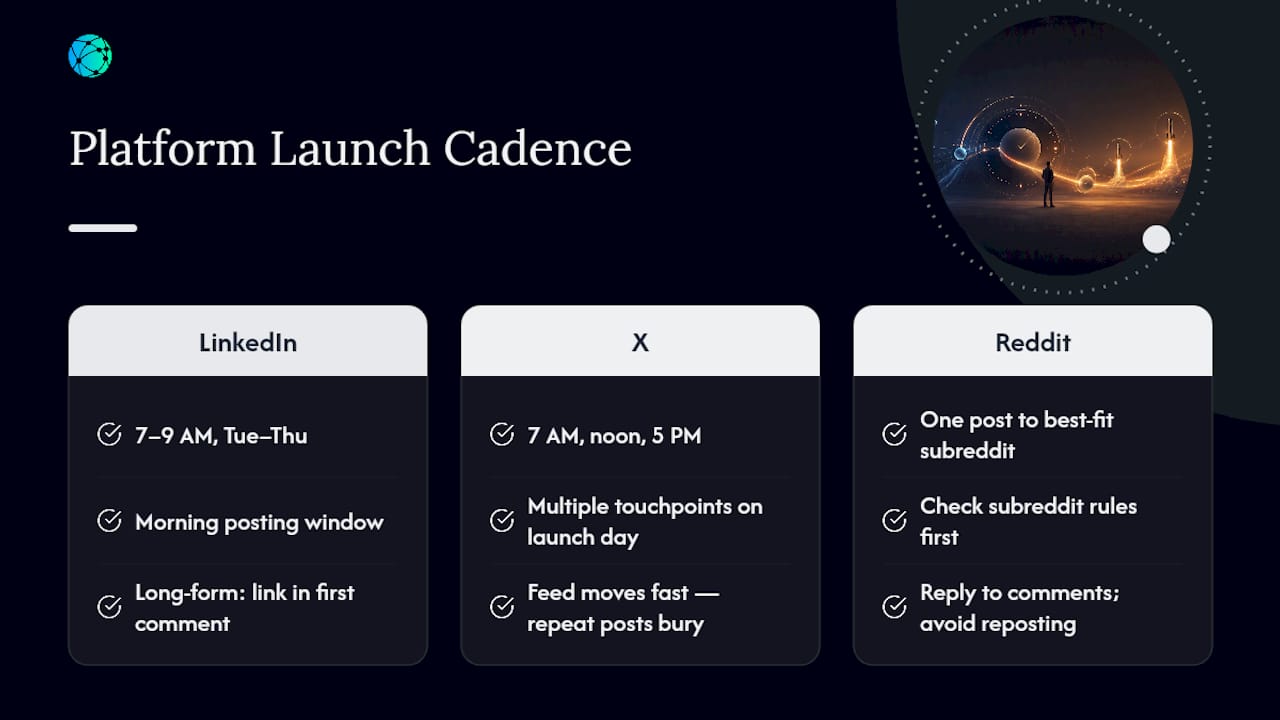
Platform habits differ enough that a single posting time rarely works everywhere. LinkedIn performs best between 7 and 9 AM Tuesday through Thursday, and long-form posts do better with the link in the first comment rather than the caption. X rewards multiple touchpoints on launch day itself, think 7 AM, noon, and 5 PM, since the feed moves fast and one post gets buried within hours. Reddit is different territory entirely: check subreddit rules first, then post once to the best-fit community and spend your energy replying to comments instead of reposting.
For your link hub itself, keep it to 3 to 7 destinations and let a focused landing page carry the primary call to action rather than burying it in a long list. Match your CTA text to whatever the post promised: if the tweet says "grab early access," the button should say the same thing, not "learn more."
Rotate your primary destination on a cadence that matches the offer: weekly for short promos, monthly for a newsletter push, quarterly for major product drops. A hub that never rotates starts to look abandoned even when the rest of your content is active.
Pre-Launch and Launch-Day Checklist
- 72 hours out: Verify every UTM tag matches your naming scheme.
- 48 hours out: Preview all scheduled links and confirm final assets and copy are approved.
- 24 hours out: Confirm collaborator and permission access so the right people can make last-minute fixes.
- First hour of launch: Check click data on every platform and confirm links are firing correctly.
- Day 0, ongoing: Assign someone to monitor comments and replies in real time.
- Day 0 to +2: Swap any underperforming content or fix broken assets immediately.
- Day +1 to +7: Confirm follow-up posts are queued and firing on schedule.
If something breaks, have a rollback plan ready: unpublish the faulty link and swap in a backup destination rather than leaving a dead link live while you troubleshoot. A five-minute fix beats an hour of lost traffic.
Why a Scheduling-Enabled Link Hub Simplifies Launches
Running a launch without a dedicated hub means juggling shorteners, spreadsheets, and manual link swaps at 6 AM on launch day. Lflow consolidates that into one system built for exactly this workflow.
- Scheduled and auto-archived links handle the go-live and cleanup steps automatically, so nobody has to remember to deactivate a promo manually.
- Onboarding under two minutes means you can set up a new campaign hub the same day you plan it.
- Custom domains and customizable hubs keep the experience on-brand instead of looking like a generic redirect.
- Real-time analytics cover the verification step from your checklist directly.
- Downloadable QR codes extend the same tracking to offline promotion.
| Checklist need | Lflow feature |
|---|---|
| Verify links fired | Real-time analytics |
| Clean follow-through | Auto-archive rules |
| Offline promotion | Downloadable QR codes |
| Fast setup before launch | Under two minute onboarding |
Should Scheduled Links Connect to Email and Other Channels?
Social posts get the spotlight during launch week, but email often converts better because your list already trusts you. The same scheduled link and UTM structure you use on Instagram or X should carry over into your email campaigns, just swap utm_source=email and utm_medium=newsletter so your dashboard can separate that traffic cleanly from social clicks.
Time your email sends to reinforce, not compete with, your social cadence. A common pattern: send the launch announcement email within an hour of your first social post, then follow up on day +3 with a reminder that links to the same destination, tagged with a different utm_content value so you can see which email actually drove the click.
If you run paid ads alongside the launch, point them to the same landing page as your organic links, tagged with utm_medium=paid so you're not mixing paid and organic performance in the same bucket. For teams running broader automation across channels, pairing this kind of link discipline with a marketing automation system keeps email, social, and paid working from the same campaign calendar instead of three disconnected tools.
The goal is one link, one destination, one campaign name across every channel. Consistent tagging is what lets you answer the question every launch retro asks: which channel actually moved the needle?
Perspective: Common Launch Mistakes and Quick Fixes
The failures I see most often aren't creative, they're logistical. Teams make last-minute copy changes that break scheduled posts, forget UTMs on half their links, or never actually test the scheduled link before it goes live. The fix isn't more effort, it's earlier effort: stage content days ahead instead of hours ahead, preview every link before launch, assign one person to watch analytics during the first hour, and queue a full week of follow-up posts so momentum doesn't die the moment the initial buzz fades.
— Axion
Get Started With Lflow for Your Next Launch
Lflow gives you one place to build the entire technical setup this guide walks through: scheduled links with exact go-live times, auto-archive rules for tidy follow-through, and real-time analytics to confirm every platform is pulling its weight. Instead of juggling a shortener, a spreadsheet, and a manual calendar reminder, you stage the whole campaign, links, timing, and UTMs, in one hub before launch week even starts.
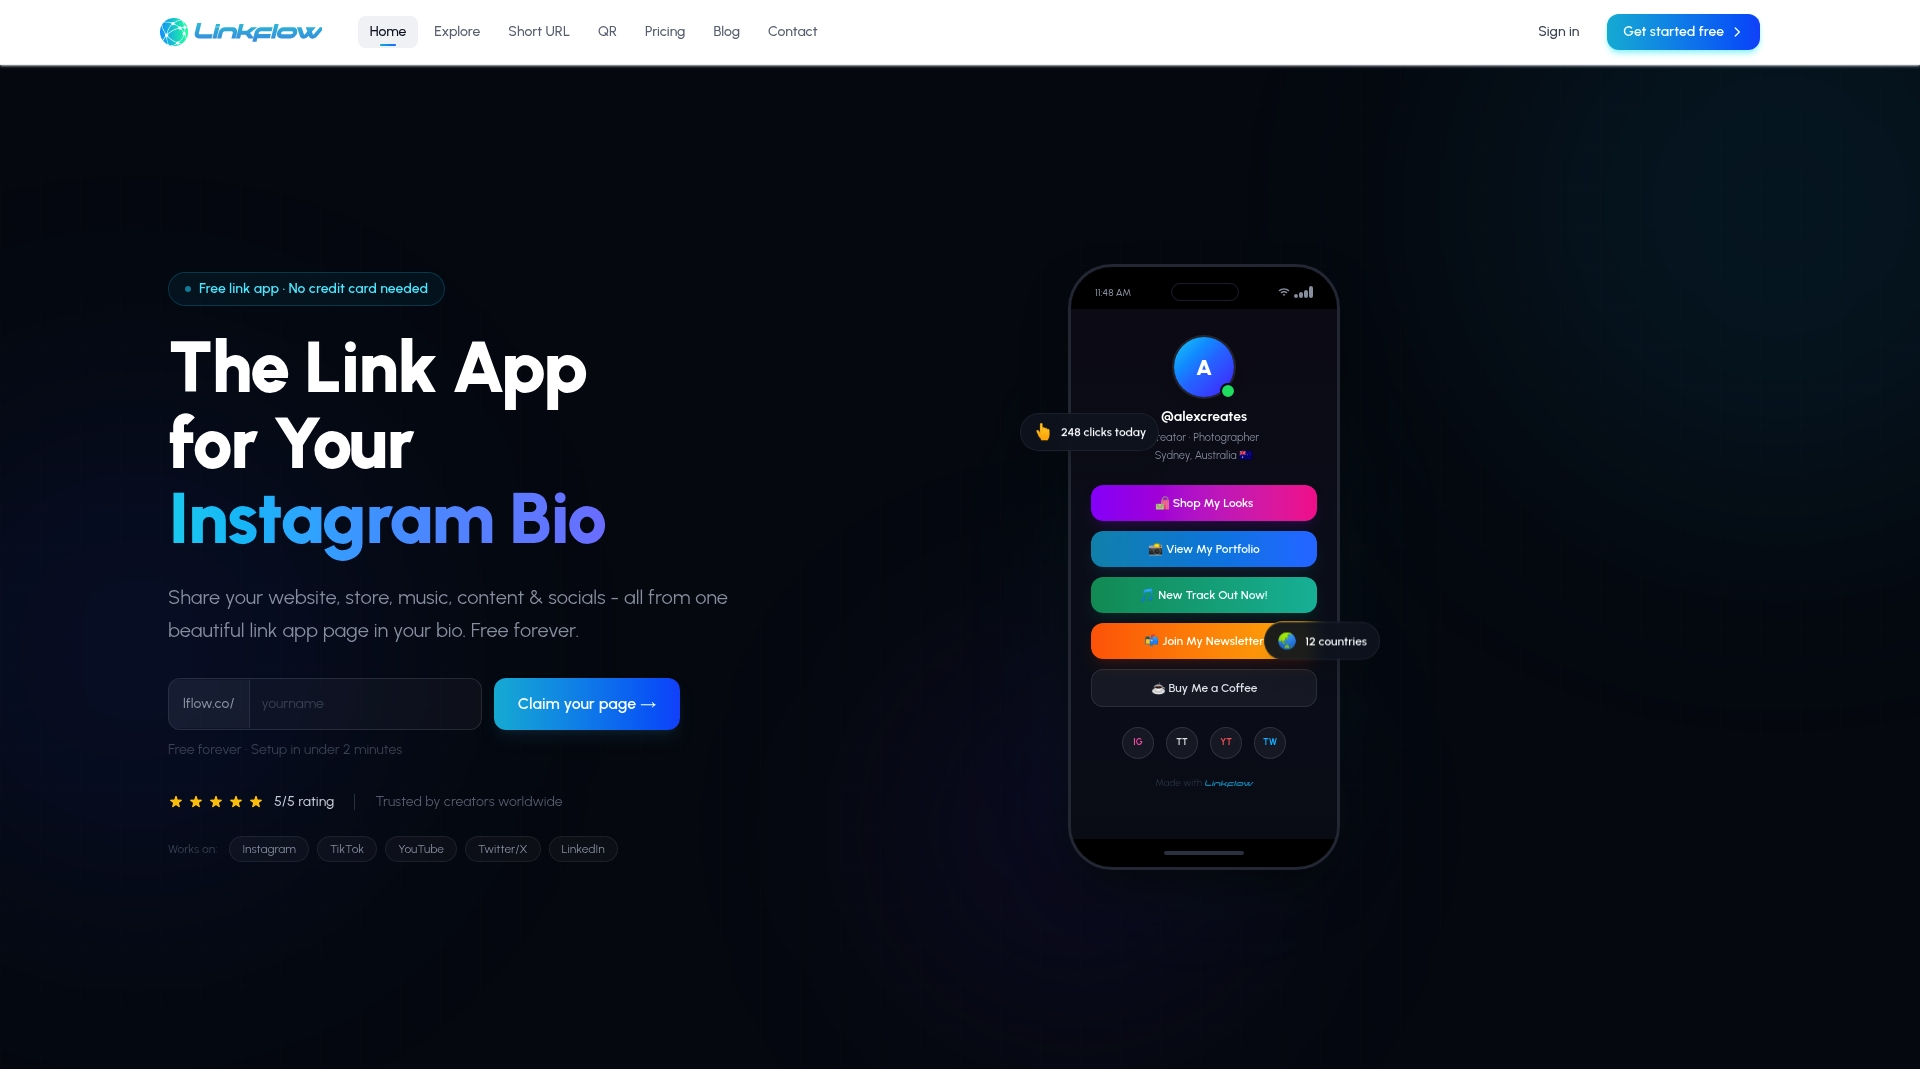
Set up your free link in bio hub now, schedule your first campaign link with an exact go-live time, and see the click data roll in the moment your launch goes live.
Sources
- Cross-Platform Posting Week for a Product Launch (2026)
- Best Social Media Scheduler for Product Launches (2026) | Timed Post