

A personalized link hub workflow is the process of consolidating every destination you want your audience to visit, your shop, music, videos, and profiles, into one branded URL, then customizing, publishing, and tracking it so clicks turn into real outcomes. The whole thing breaks down into three moves: pick your domain and visual identity, build and customize the hub, then publish and measure. That order matters. Skip the branding step and you're just renting space on someone else's URL.
Lflow's onboarding takes under two minutes, which is roughly the time it takes to type out a decent Instagram caption. That speed matters less than what happens after: a custom domain can increase engagement by more than 40% when the URL clearly signals a professional brand rather than a generic third-party subdomain. Fast setup gets you live. A branded identity is what gets people to actually click once you're there.
Key Takeaways
A personalized link hub workflow succeeds when a branded custom domain, a short prioritized link list, and real-time analytics work together to turn clicks into measurable outcomes.
| Point | Details |
|---|---|
| Define the workflow | Choose your domain and identity, build and customize the hub, then publish and measure results. |
| Keep links to 3–7 | Pages with fewer, prioritized links consistently outperform long, unsorted link lists. |
| Get a custom domain | A branded domain can lift engagement by more than 40% compared to unbranded URLs. |
| Set up tracking before publishing | Add UTM parameters and confirm analytics are live before you share the link anywhere. |
| Try Lflow for setup | Lflow offers under two minute onboarding, custom domains, real-time analytics, and free QR codes on its free plan. |
Table of Contents
- Building Your Personalized Link Hub Workflow Step by Step
- Why Branding and Custom Domains Change Click-Through Rates
- What KPIs Should You Track on a Link Hub?
- Where and How to Promote Your Link Hub
- Security and Content Controls Worth Setting Up
- Templates for Creators, Musicians, and Small Businesses
- A Simple Calendar for Testing and Improving Your Hub
- How Creators Actually Use a Link Hub Day to Day
- How Lflow Supports This Exact Workflow
- Sources
Building Your Personalized Link Hub Workflow Step by Step
The fastest path from zero to a published hub follows a specific order, and skipping steps early usually means redoing them later. Here's the sequence that avoids that:
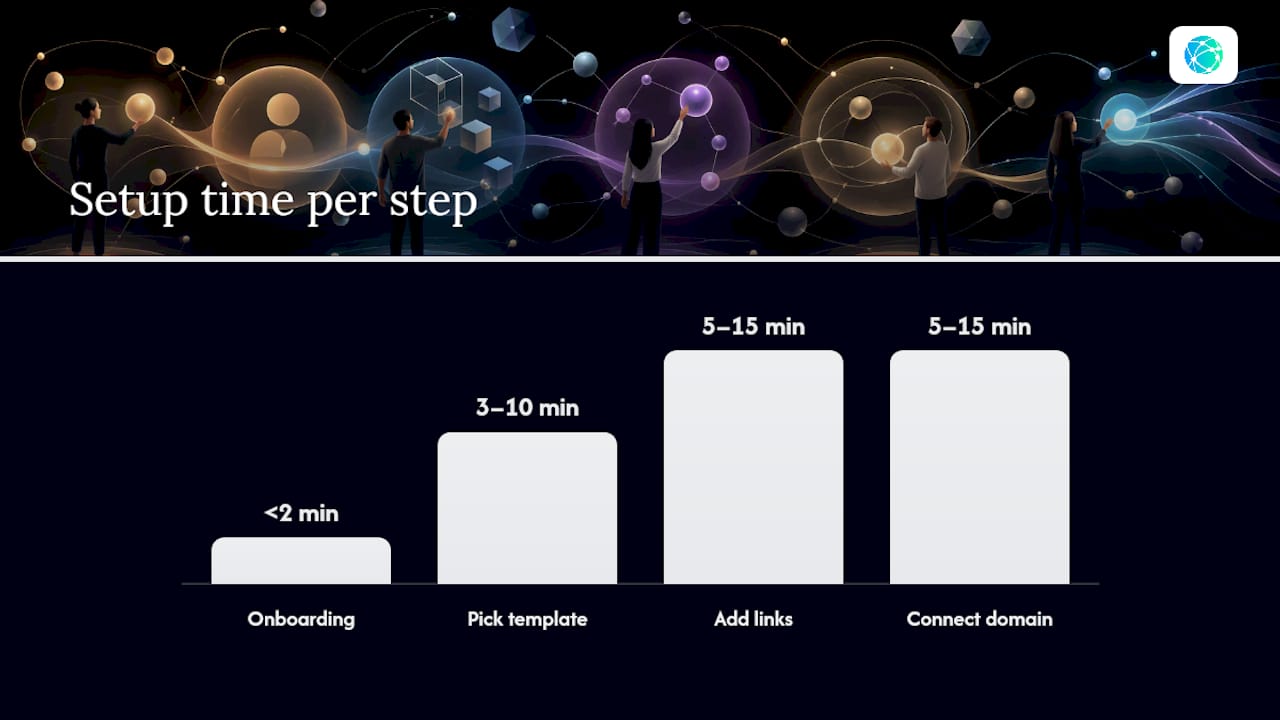
- Create your account and complete onboarding. This takes under two minutes on Lflow, and you'll land with a blank template ready to name.
- Pick a template that matches your layout needs. Budget 3 to 10 minutes here. Musicians want a layout that puts streaming links up top; small businesses want booking or shop links prioritized.
- Add your links. Plan on 5 to 15 minutes. Resist the urge to dump every URL you own into the page. Pages built around 3 to 7 links consistently outperform longer lists, because fewer choices mean a higher chance any single link gets clicked.
- Connect a custom domain. This runs 5 to 15 minutes depending on your registrar, since DNS propagation is the variable you can't control.
- Set up analytics and UTM tagging before you publish, not after. Retrofitting tracking onto a live hub means losing your baseline data.
Before you open the builder, gather your assets: a square profile image, short CTA copy for each link (five words or fewer performs best), and the actual destination URLs, not placeholders. Having these ready turns a 45-minute session into a 20-minute one.
Pro Tip: Preview your hub on an actual phone, not just your laptop browser, and check it on both Instagram's and TikTok's in-app browsers before you post the link anywhere. In-app browsers render fonts and spacing differently than Safari or Chrome, and that's exactly where most of your traffic will land.
Why Branding and Custom Domains Change Click-Through Rates
A hub sitting on a generic third-party domain reads as an afterthought. A hub on your own domain reads as a business. That distinction shows up directly in the numbers.
Custom domains signal a professional identity and can lift audience engagement by more than 40% compared to unbranded, platform-hosted URLs.
Beyond the trust factor, owning your own domain also protects your search visibility long-term, something a shared subdomain can never offer you since you're building equity on someone else's property.
Design choices compound that trust once someone lands on the page:
- Put your single most important CTA at the top, above the fold, every time.
- Use color contrast that separates buttons from background, not just aesthetic matching.
- Establish a clear typography hierarchy: headline, CTA text, secondary links, in that visual order.
- Make every tappable element at least 44 pixels tall. Thumbs are not precision instruments.
- Place your logo or profile image at the top so the page feels unmistakably yours.
Connecting a domain itself is a short checklist: choose a domain name (typically $10 to $20 a year), point the A or CNAME record at your host, confirm SSL is issued and active, then set any redirect rules so old links don't break.
What KPIs Should You Track on a Link Hub?
The single number that matters most is your primary CTA's conversion rate, the percentage of visitors who click your top link, not the total click count. Raw clicks feel good but tell you nothing about whether the hub is actually working.
| KPI | What it indicates | Action threshold |
|---|---|---|
| Click volume | Overall traffic reaching the hub | Track weekly; flag sudden drops |
| Click-through rate (CTR) | How compelling your top links are | Below 20% CTR on primary link signals a CTA problem |
| Conversion rate | Whether clicks turn into sales or signups | Rising traffic with flat conversion means a destination-page issue, not a hub issue |
| Device split | Mobile vs desktop behavior | Over 80% mobile means desktop layout testing is a low priority |
| Geo distribution | Where your audience actually is | Mismatched geo and language settings hurt conversion |
| QR scans | Offline-to-online bridge performance | Near-zero scans after a print push means the QR placement or size failed |
Setting up tracking is its own short workflow:
- Create a unique UTM parameter for every campaign or platform you post the link on.
- Use short links for anything going into print or a video overlay, since long UTM strings look messy on camera.
- Check your analytics dashboard within 24 hours of posting to confirm data is actually flowing before you assume the campaign is working.
Pro Tip: Run a one-week baseline test before changing anything. Track your current CTR and conversion rate for seven days, then make one change, a new CTA, a reordered link list, and compare the next seven days against that baseline instead of against your gut feeling.
Where and How to Promote Your Link Hub
Building the hub is half the job. Getting it in front of the right eyes, in the right format, is the other half.
- Instagram and TikTok: the bio link field, obviously, but also pin a Story highlight pointing new followers there.
- YouTube: put it in the first two lines of your video description, since YouTube truncates long descriptions.
- Twitter/X: the bio link field, plus a pinned tweet for major launches.
- Email signature: a small text link works better here than a big graphic button.
- Business cards and printed materials: this is where a QR code earns its place.
QR codes deserve specific attention because they're the bridge between offline and online. Generate one sized for the medium: at least 1 inch square for business cards, larger for posters, and test the scan distance before printing 500 copies. A free QR code generator tied to your hub link means the code updates automatically if the underlying URL ever changes.
For time-limited promotions, duplicate your hub rather than editing the live one. That preserves your historic analytics on the original and lets you tear down the campaign version cleanly when it ends, without breaking a URL that's already printed on merchandise or business cards.
Pro Tip: Duplicate, don't overwrite. A campaign-specific hub variant protects your baseline data and means you're not scrambling to undo changes the day after a tour date or product drop ends.
Security and Content Controls Worth Setting Up
Basic controls prevent the two most common failures: exposing something too early and leaving something live too long.
- Password-protect any hub meant for a private audience, like an early-access product drop or a members-only playlist.
- Schedule auto-archiving for time-limited offers so an expired discount code doesn't sit live for months.
- Set link expiration dates on individual links tied to specific events.
- Enable two-factor authentication on your account, since a hijacked link hub can redirect your entire audience.
- Export your click logs to CSV periodically. Your analytics history is audience data you should own outright, not data locked inside a platform.
- Use link-level privacy toggles when you want to hide one destination without taking the whole hub down.
Owning your custom domain matters here too: if you ever migrate platforms, a domain you control moves with you. A subdomain doesn't.
Pro Tip: Schedule the archive date the moment you create a limited-time offer, not after it ends. It's the single easiest way to stop a stale "50% off, ends Friday" link from embarrassing you in March.
Templates for Creators, Musicians, and Small Businesses
Three layouts cover most use cases, and each one prioritizes a different first action.
Creator template. Order: latest video first, merch second, newsletter signup third. Sample CTA: "Watch this week's episode." The analytics goal here is video click-through, since that's the metric that correlates with channel growth.
Musician template. Order: latest single or streaming links first, tour dates second, merch third. Sample CTA: "Stream the new single." Track streaming-link clicks as the primary goal, with tour date clicks as a secondary signal for routing future shows.
Small business template. Order: book an appointment first, shop second, contact third. Sample CTA: "Book your appointment now." Conversion rate on the booking link is the number that actually pays the bills here.
Each layout leans mobile-first by design, since the tappable target for the top link should always be the largest element on the page. That's the fastest path to a conversion, and responsive layout examples show how small changes in link order shift real click behavior across these three personas.
A Simple Calendar for Testing and Improving Your Hub
Treat your hub the way you'd treat any other marketing asset: something you tune, not something you set and forget.
- Week 1: Establish a baseline. Don't change anything, just record CTR, conversion rate, and device split.
- Weeks 2 through 4: Run single-variable tests only, one at a time, CTA wording, button color, or link order, never all three at once.
- Day 30: Review results. Keep whatever beat baseline by a meaningful margin and revert whatever didn't.
- Day 60: Run a larger structural test, like reordering your top three links entirely or testing a new template.
- Day 90: If performance has plateaued, consider a full redesign rather than another small tweak.
Judge every test by relative change against your own baseline, not by raw click counts, since traffic naturally fluctuates with your posting frequency and platform algorithm shifts. Once a change proves itself on your main hub, roll it out to any campaign-specific duplicates you're running in parallel.
How Creators Actually Use a Link Hub Day to Day
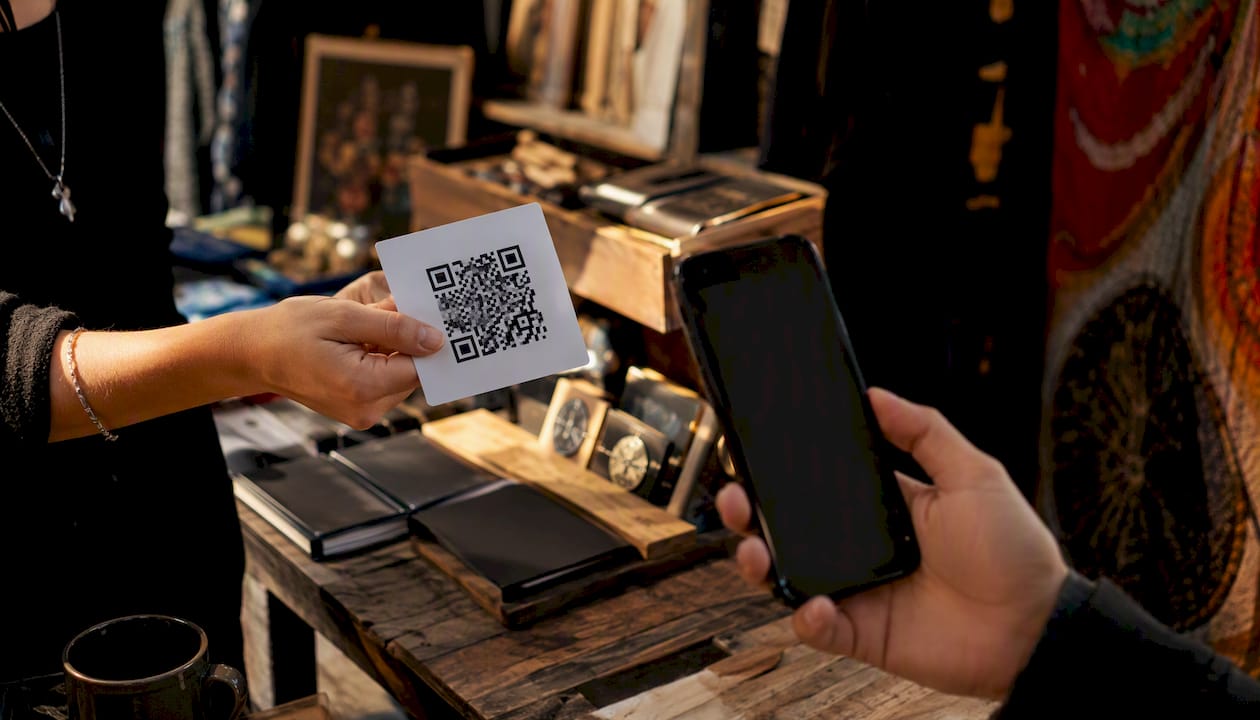
Most working creators don't think about their link hub until right before they post, and that's actually the correct instinct. The typical rhythm looks like this: post a new video or single, swap the top link to point at it within minutes, then check the click count later that night out of curiosity more than strategy. At a live show or pop-up event, the QR code becomes the entire interaction, someone scans it standing in line for merch, and the hub does the selling while you're busy performing.
The operational trick that saves the most time is keeping one primary CTA slot and treating it like a rotating pin, not a permanent fixture. Swap what's in that top slot constantly; leave everything below it stable. That's the difference between a hub that feels alive and one that quietly goes stale.
Because onboarding runs under two minutes and analytics update in real time, the whole loop, post, swap, check, tends to take less time than writing the caption that goes with it.
How Lflow Supports This Exact Workflow
Lflow is the free plan built to skip the setup friction the rest of this article just walked through: onboarding under two minutes, a custom domain option instead of a generic subdomain, real-time analytics instead of a delayed export, and free downloadable QR codes for the offline half of your promotion.
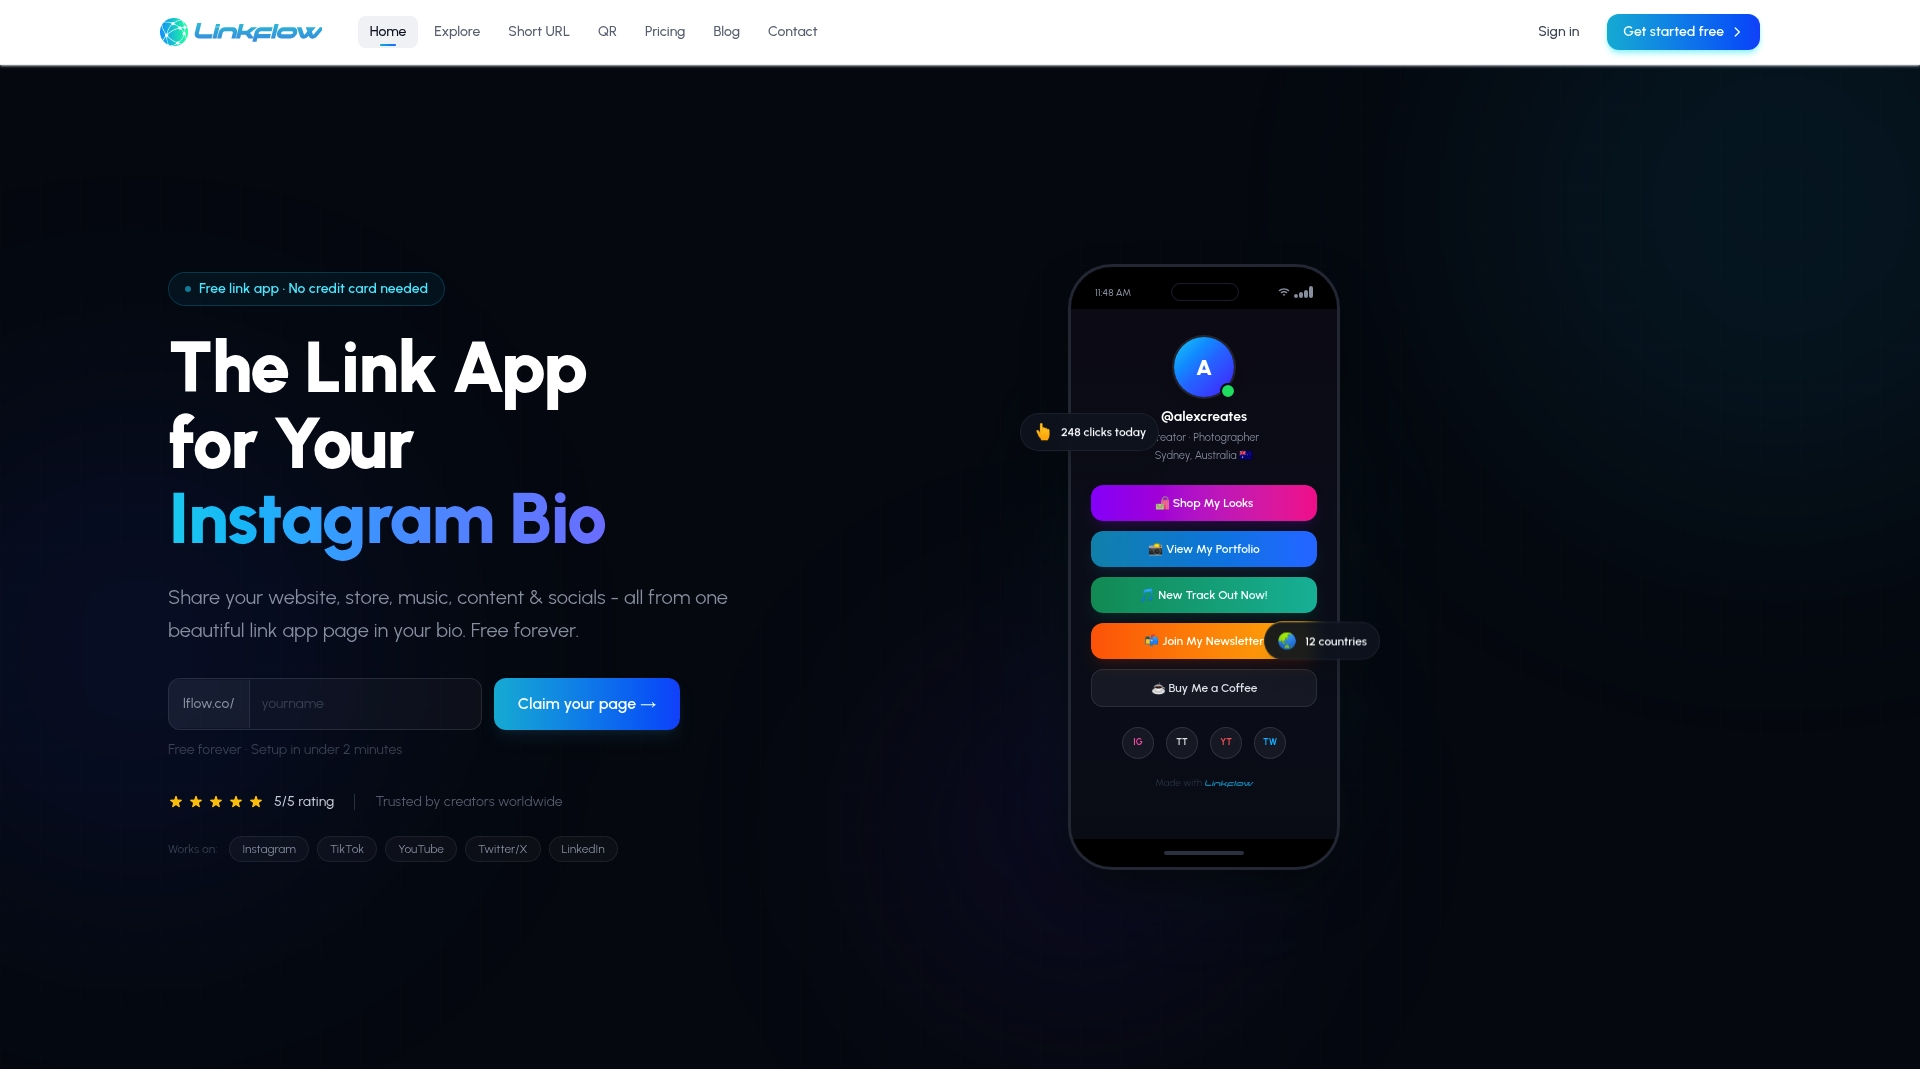
Every step in this workflow maps to a specific product capability. Choosing your domain and identity happens during setup. Building and customizing the hub uses the template and design tools. Publishing and measuring runs through the real-time dashboard. Scheduled and auto-archived links handle the security controls covered earlier, so a limited-time offer doesn't sit live past its expiration date. The free plan covers unlimited links and core analytics, and paid tiers add advanced branding removal and deeper analytics when you're ready for them.
If you want to see the workflow live before committing to anything, start with the free link-in-bio builder and have a published hub running before your next post goes out.
Sources
- Why custom domains matter | VerticalResponse blog
- Five Reasons Your Personal Link Page Needs a Custom Domain for Better Branding | NameSilo Blog
- Linktree vs. Beacons vs. Stan: Link-in-Bio Tools… — Prelink