

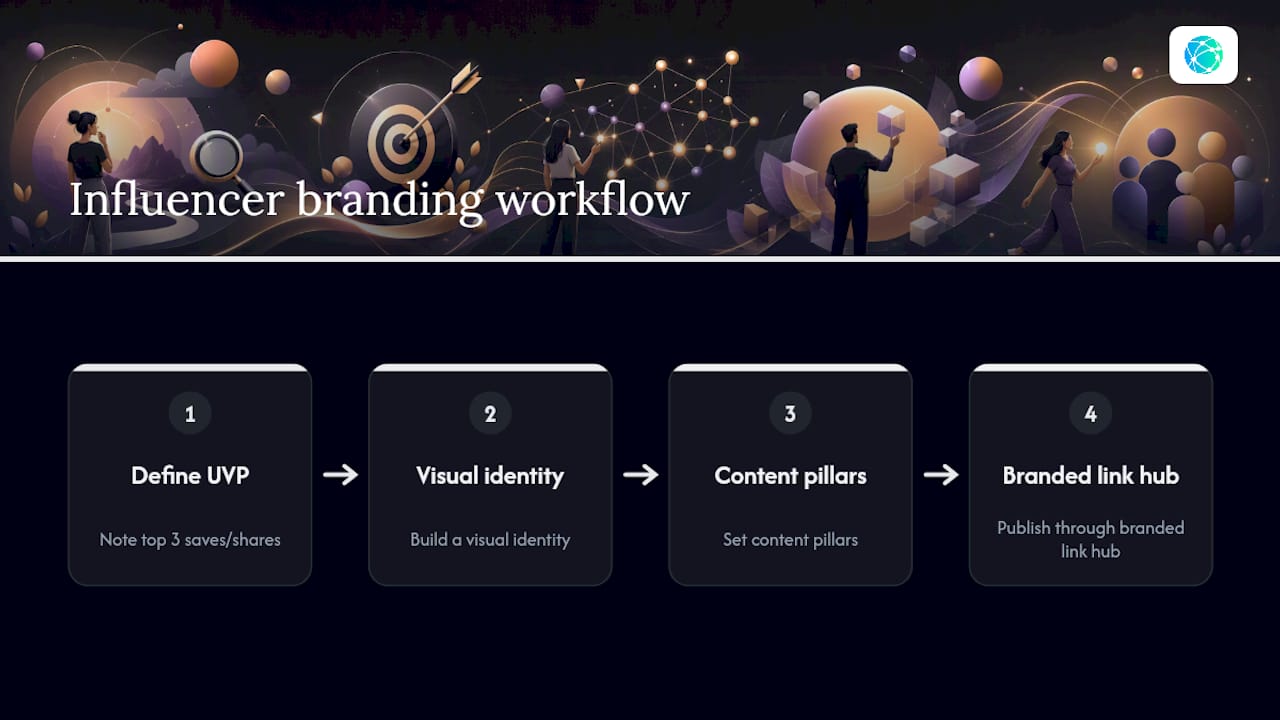
The influencer branding process is a four-step workflow: define your UVP, build a visual identity, set content pillars, then publish it all through one branded link hub. Skip straight to the first move: open your platform analytics (Instagram Insights or TikTok Analytics) right now and spend 20 minutes noting which three posts drove the most saves or shares. That single pattern tells you more about your niche than a week of guessing.
Key Takeaways
A cohesive influencer brand comes from a narrow UVP, consistent visuals, focused content pillars, and one branded link hub that ties them together.
| Point | Details |
|---|---|
| Research before positioning | Pull an analytics snapshot and run one audience poll before writing your UVP. |
| Pass the substitution test | Your brand statement should fail if another creator's name could replace yours. |
| Lock a compact visual system | One primary color, one secondary, two fonts, and a reusable thumbnail template. |
| Structure the hub by priority | Headline, primary CTA, secondary CTAs, opt-in, then a work-with-me link. |
| Publish with Lflow | Lflow's free templates and QR codes let you launch a working hub in under two minutes. |
Where to Go Next
- Prelink's creator branding playbook for the full 90-day framework.
- Lflow's free templates to publish your hub today.
- Instagram Insights, TikTok Analytics, and a simple Google Form for fast audience research.
Table of Contents
- What Is the Influencer Branding Process, and Where Does Research Fit In?
- How Do You Define a UVP and Write a Brand Statement?
- How Do You Build a Visual Identity That Actually Holds Up?
- How Many Content Pillars Should You Have, and How Often Should You Post?
- How Do You Structure a Branded Link-In-Bio Hub That Converts?
- What Should You Track, and How Often Should You Audit It?
- How Do You Launch and Promote Your New Link Hub?
- What Mistakes Damage a Creator Brand the Fastest?
- How Lflow Helps You Publish and Test Your Hub Faster
- Frequently Asked Questions
- Sources
What Is the Influencer Branding Process, and Where Does Research Fit In?
You can't define a UVP off a hunch. Audience research grounds it, and the fastest version takes an afternoon, not a month.
Start with a snapshot of your own analytics: which posts get saved, which get skipped, which comments repeat the same question. Cross-reference that with a direct ask. Impact's guide to influencer branding recommends pairing analytics with audience polls before you commit to a voice or a niche, and that order matters. Data first, opinion second.
A compact checklist:
- Pull a recent analytics snapshot highlighting your top posts by engagement beyond just likes.
- Run one Instagram Story poll or a two-question Google Form asking what your audience wants more of.
- Scan your DMs and comments for repeated phrases. That's your audience's actual vocabulary.
- Note which platform (Instagram, TikTok, YouTube) gives you the strongest signal, and treat it as home base.
Pro Tip: Run a 7-day validation test: post a poll asking "more of X or more of Y," then follow the winning answer with a single clear call to action. The click-through rate on that CTA tells you more than the poll itself.
How Do You Define a UVP and Write a Brand Statement?
A UVP fails the moment someone else could say it too. Run the substitution test: if you can swap your name for a dozen other creators in your niche and the sentence still holds, it's not narrow enough yet. The strongest creator brands pass what Prelink calls the 12-month test: a positioning line specific enough to still feel true a year from now, not just a trending angle.
Your brand statement should fit one line: "[Format] for [audience] who want [specific outcome], without [common tradeoff]." See how to craft your personal branding strategy for agency-level guidance on positioning and brand clarity. A creator making budget travel content might land on "Weekend trip planning for people who can't take two weeks off." Simple, testable, ownable.
Three-step micro-workshop:
- Draft five versions of your one-line statement.
- Read each to five people outside your niche and ask what they think you post about.
- Keep the version that produced the most consistent (and accurate) answers.
Put the finished line in your Instagram bio, your YouTube "About" section, and the headline of your link hub. Consistency across those three spots does more for recognition than any single post.
How Do You Build a Visual Identity That Actually Holds Up?
Pick one primary color, one secondary, one neutral. Add two fonts, max: one for headlines, one for body text. That's the entire palette most creators need, and going wider almost always leads to drift.
Build a mood board, not a swipe file. A swipe file collects other people's work; a mood board tests whether your own choices feel distinct when placed side by side. If your thumbnail could pass for three other creators in your niche, tighten it.
- Lock a thumbnail template: same text placement, same color overlay, every time.
- Set one profile photo standard and reuse it across every platform.
- Write down your visual "don'ts": no stock photography, no more than two fonts, no off-palette colors in Stories.
- Adapt lightly per platform (TikTok crops differently than YouTube) but never abandon the core palette.
A compact brand identity document covering these rules in a page or two keeps you consistent for months without a rebrand.
Pro Tip: Build your thumbnail and Story templates once in Canva, lock the color values as brand presets, and every future post starts from that file. Ten extra minutes now saves you from stitching together mismatched thumbnails at midnight.
How Many Content Pillars Should You Have, and How Often Should You Post?
Several pillars tied directly back to your UVP provide balanced content; too few leaves content thin, too many dilutes audience clarity.
Map each pillar to the format it suits best. A "quick tips" pillar fits short-form video. A "deep dive" pillar suits long-form YouTube or a newsletter. A "behind the scenes" pillar works well in Stories or community posts. This isn't about posting everywhere equally; it's about giving each pillar its natural home.
Prelink's hub, spoke, and search model is worth borrowing here: one owned hub (a newsletter or your link page), one high-velocity spoke (TikTok, Reels, or Shorts for discovery), and one search asset (YouTube or a blog) that keeps working long after you post it.
A simple weekly cadence:
- Two to three spoke posts (short-form, discovery-focused).
- One search-asset upload or article.
- One hub touchpoint: a newsletter send or a hub update.
Track which pillar earns the most saves versus the most comments; saves usually signal reference value, comments signal community. Both matter, but they call for different follow-up content.
How Do You Structure a Branded Link-In-Bio Hub That Converts?
Order matters more than most creators think. Put your brand statement at the top, immediately followed by your single primary CTA (the one action you most want visitors to take). Everything else supports that.
A hub that works usually runs in this order: headline and brand statement, primary CTA, secondary CTAs (shop, latest video, socials), a touch of social proof (press mentions or a milestone number), your best current content, an email opt-in, and a "work with me" or contact link near the bottom.
- Headline: your one-line brand statement, not just your name.
- Primary CTA: the single highest-value action, placed above the fold.
- Secondary CTAs: three to five max, grouped logically.
- Opt-in: an email or newsletter signup, since owning that list reduces your platform dependence if any single app changes its algorithm.
A branded short domain and mobile-first layout builds more trust than a generic third-party link string, and it makes your hub easy to say out loud in a video. Add a QR code for offline use and track clicks at the link level, not just page visits. Real-time click and scan data tells you which CTA is actually pulling weight.
Pro Tip: Test one variable at a time. Swap your headline for two weeks, keep the CTA fixed, then swap the CTA next. Even a few hundred visits a week is enough to spot a meaningful shift in click-through rate.

What Should You Track, and How Often Should You Audit It?
Five numbers matter most: click-through rate from your bio, conversion rate on your primary CTA, email signup rate, link-level engagement across secondary CTAs, and any retention signal (returning visitors, repeat email opens).
Check weekly for anything obviously broken. Run small experiments monthly. Do a full brand audit quarterly, comparing your current voice, visuals, and pillars against what you set out to build.
- Low CTR from your bio? Rewrite the headline or reorder your CTAs.
- High CTR but weak conversion? The problem is the landing experience, not the traffic.
- Flat engagement despite follower growth? Pull a poll and ask directly what changed.
Pair the numbers with qualitative feedback. A poll asking "what's missing here?" often explains a metric dip faster than a spreadsheet does.
How Do You Launch and Promote Your New Link Hub?
Update every bio the same day you publish the hub, so there's no gap between announcement and destination. Pin an announcement post, run a short Stories or TikTok clip pointing directly at the hub, and mention it in your next newsletter if you have one.
Platform quick wins: pin the announcement on Instagram, mention the hub link explicitly in your TikTok caption (since the platform doesn't make links clickable in-video), and drop it in your YouTube description above the fold.
- Print a QR code for any in-person event, merch table, or business card.
- Add UTM parameters to each platform link so you know which channel actually drove the click.
- Set up a retargeting pixel on your hub if you plan to run ads later.
Pro Tip: Launch on a day you're already posting your best-performing pillar. Borrowing that post's built-in reach gets your hub in front of more eyes than a cold announcement would.
What Mistakes Damage a Creator Brand the Fastest?
Inconsistent voice tops the list. So does switching niches every few months chasing whatever trend spiked that week. A weak CTA (or none at all) wastes traffic you worked hard to earn, and skipping an owned hub or email list leaves your entire audience one algorithm change away from disappearing.
Conflicting signals across posts (different tone, different visuals, different promises) measurably lower audience retention. Coherence, not volume, is what keeps followers converting over time, according to Lindenwood University's analysis of influencer marketing.
Red flags to watch for: your last ten posts don't visually match, your follower count is climbing but saves and shares aren't, or your link hub's CTAs lead to pages you haven't updated in months. Small fixes (a new thumbnail template, a rewritten CTA) usually solve the first two. If your niche itself has drifted, that's a deeper pivot worth planning deliberately, not patching over.
What Separates Brands That Scale From Brands That Stall?
Coherence beats volume, almost every time. A creator posting three times a week with a locked visual template and a consistent CTA will out-convert someone posting daily with a different look each time. One creator we've seen described in industry case studies rebuilt nothing but their link hub order and headline, and their email signup rate improved within a month, no new content required. If you're stuck on execution, the next section covers the tools that make this fast to implement.
How Lflow Helps You Publish and Test Your Hub Faster
Lflow is built around the exact final step this whole process leads to: one branded page that carries your UVP, your visual identity, and your CTAs in one place. The free templates map directly to the hub structure covered above: headline slot, primary CTA button, secondary link grid, and an opt-in field, all pre-built so you're not designing from a blank page.
Setup takes under two minutes. Pick a template, drop in your brand statement and colors from your style guide, reorder your links to match the primary-then-secondary structure, and publish. A free QR code comes with every hub for offline promotion, and real-time analytics show clicks per link so you can run the A/B tests described earlier without guesswork. If you're routing traffic from multiple campaigns, Lflow's short URL generator lets you create trackable branded links for each platform. Start with the free plan, build your hub tonight, and see your first click data by tomorrow.
Frequently Asked Questions
What is the influencer branding process, in one sentence? It's the workflow of defining a narrow UVP, building a consistent visual identity, setting content pillars, and publishing everything through one branded link hub.
How long does it take to build an influencer brand from scratch? A focused creator can draft a UVP and visual identity in a week, but most see the process fully take shape over 60 to 90 days as content pillars and hub analytics start producing real feedback.
Do I need a website, or is a link hub enough? A branded link hub covers most creators' needs: it centralizes your links, tracks clicks, and doubles as a landing page. A full website only becomes necessary once you're selling products or courses directly.
Should I include affiliate or sponsored links on my link hub, and do I need to disclose them? Yes, and yes. Any sponsored or affiliate link on your hub should carry a clear disclosure, in line with FTC guidance on endorsements, so your audience knows when a link is paid or commissioned.
How often should I update my content pillars? Review them quarterly. Small tweaks are normal as your audience shifts, but changing pillars monthly signals the niche drift that erodes trust faster than almost anything else.
Sources
- How to Build a Personal Brand as a Creator in 2026 — Prelink
- Personal Brand as an Influencer — Impact
- Link-in-Bio 2.0: How to Build a High-Converting Social Hub — LinkDrip
- Chapter 12: Brand Identity for Creators — Creator Economy (DataField)